How to Use Tattoo Stencils for Beginners (Step-by-Step Guide)
If you’re stepping into the world of tattooing, one of the very first skills to master is using a tattoo stencil. It’s not the most glamorous part of the process, but it’s definitely one of the most important.
Tattoo stencils act like your GPS they guide your needle so your design stays clean, symmetrical, and professional. In this beginner-friendly guide, we’ll walk you through the step-by-step stencil application process.
We’ll also break down common mistakes, tips for long-lasting results, and even where to insert visual references (photos or short videos). Whether you’re using practice skin or real skin, this guide will help you stencil like a seasoned artist.
Why Stencils Are a Game-Changer
A stencil is your blueprint. Without it, tattooing becomes guesswork and that’s risky business for beginners. Here’s why stencils matter:
- Accuracy: Ensures you stay within the design lines
- Consistency: Keeps proportions, symmetry, and spacing on point
- Efficiency: Reduces time spent correcting freehand lines
Without a clear stencil, your masterpiece can quickly turn into a mess.
Tools You’ll Need
Here’s your essential stencil setup checklist:
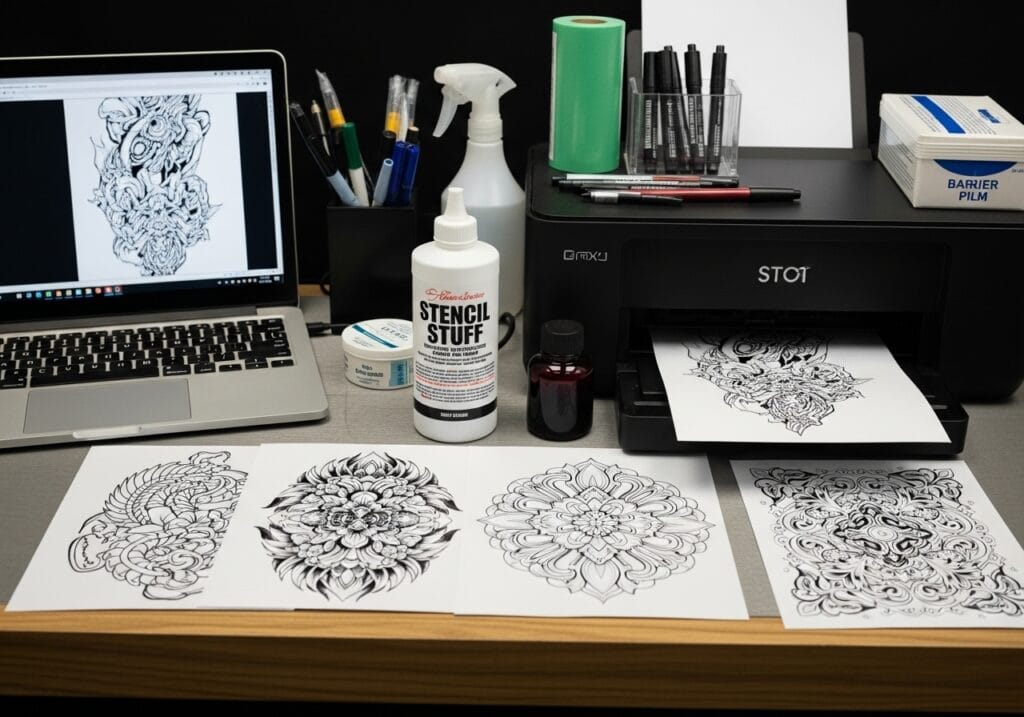
- Stencil Paper (thermal or carbon transfer)
- Stencil Transfer Gel or Primer (Green Gold, Anchored, or similar)
- Thermal Printer (optional for digital designs)
- Alcohol/Sanitizer (for skin prep)
- Razor or Clippers (to remove hair)
- Nitrile Gloves
- Clean Paper Towels or Gauze
- Practice Skin (if you’re still learning)
Step 1: Designing and Preparing the Stencil
Digital Design Users (Thermal Method)
- Mirror your design (important!)
- Print using a stencil printer
- Let the stencil cool before cutting to size
Hand-Drawn Method (Manual Transfer)
- Place the carbon sheet beneath your tracing paper
- Trace the design firmly using a pen or stylus
- Ensure every critical line transfers over clearly
Tip: Trim the stencil close to the design to avoid extra transfer paper that can interfere with placement.
Step 2: Skin Prep (It Matters!)
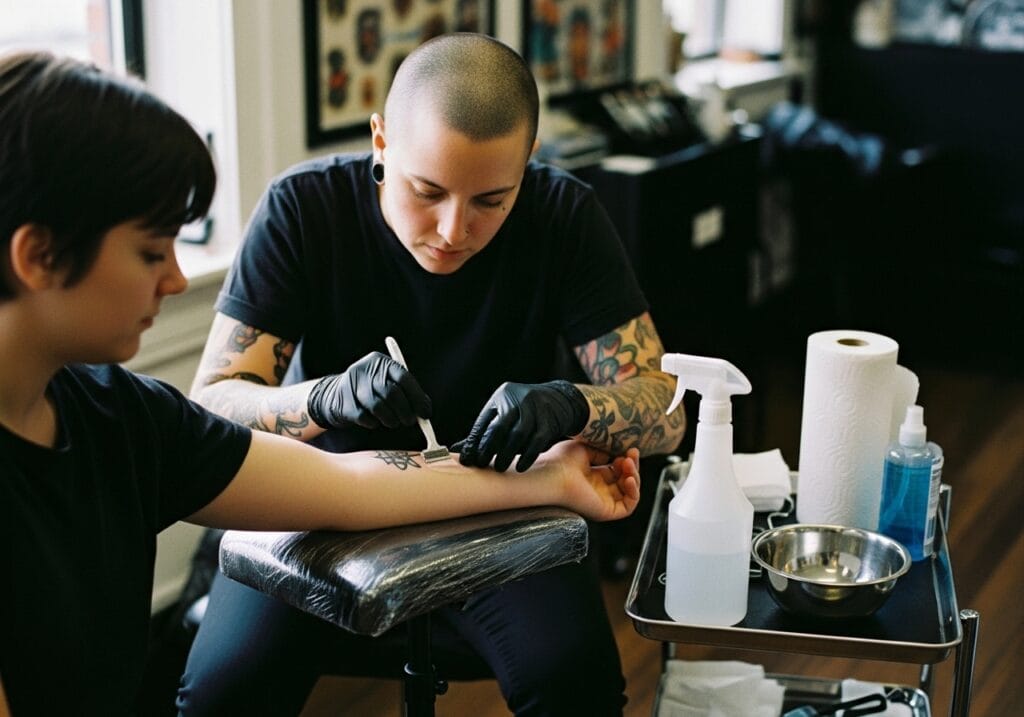
You’ve got your stencil ready now prep the canvas.
- Clean the Area: Wash with antibacterial soap or alcohol
- Shave It: Even fine hairs need to go
- Degrease: Wipe again with sanitizer or alcohol
A clean surface = a secure stencil that won’t smear halfway through the tattoo.
Step 3: Apply the Stencil Primer
Using too much gel is a common beginner mistake. Here’s what to do:
- Apply a thin, even layer across the tattoo area
- Use a clean gloved hand or cotton pad
- Spread evenly and let it get slightly tacky
If it’s slippery, it’s too much. If it’s dry, it’s too little.
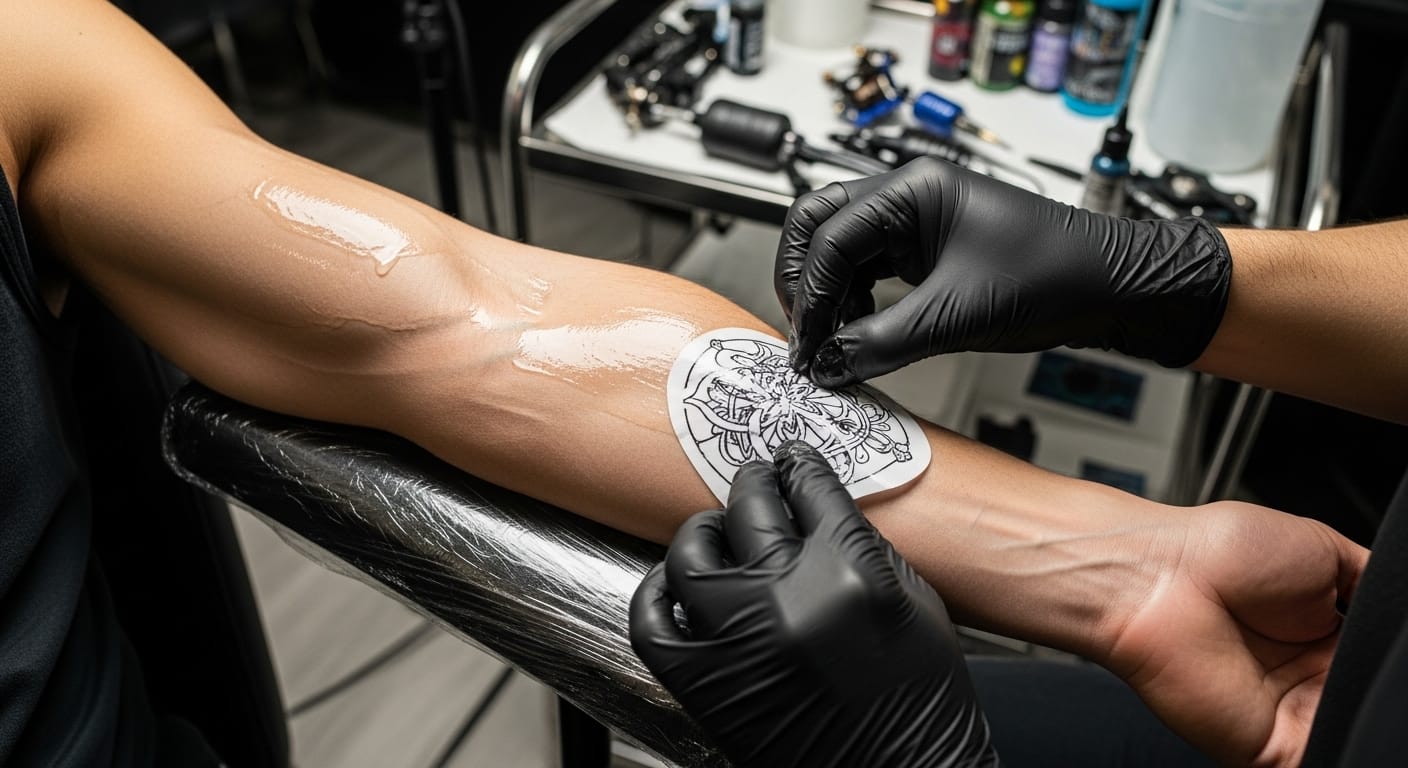
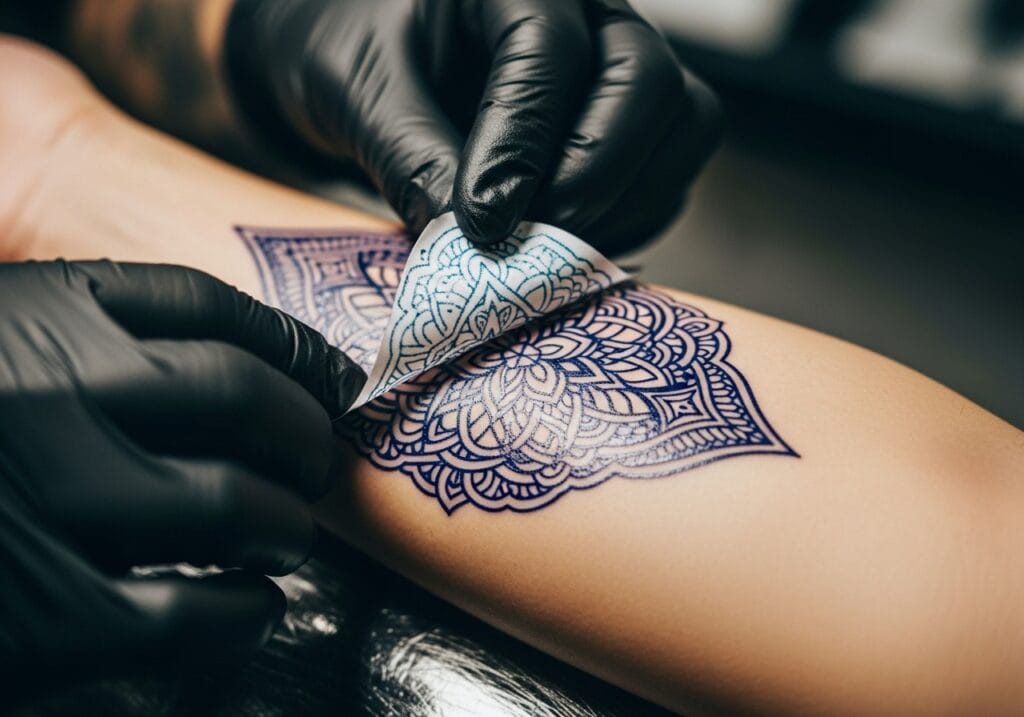
Step 4: Align & Place the Stencil
Now comes the critical moment.
- Align Carefully: Use body landmarks (elbow, wrist bones, etc.)
- Apply Slowly: Start from the center and work outward
- Press Firmly: Hold in place for 5–10 seconds
- Peel Gently: Pull away slowly without dragging
Step 5: Let It Dry
Give the stencil time to set:
- Minimum Dry Time: 10–15 minutes
- Don’t Rub or Touch It
- Blot Gently Around Edges if needed
Once it’s dry, it should look clean, crisp, and ready for action.
Step 6: Tips to Keep Stencil From Smudging
Even after a perfect transfer, bad habits can ruin your stencil. Avoid these:
- Don’t rest your hand on the stencil
- Minimize wiping (blot gently)
- Use cling film between sessions if needed
- Stay cool sweat affects stencil longevity
Bonus tip: Some pros dust a little baby powder on top of the stencil (once dry) to lock it in.
Step 7: Common Mistakes Beginners Make
| Mistake | Why It Happens | How to Fix It |
|---|---|---|
| Smudged Lines | Too much primer or shaky hands | Use less primer, apply evenly |
| Faint Design | Weak transfer pressure | Press down longer, check stencil quality |
| Misaligned Image | Poor positioning | Mark body with reference dots before applying |
| Stencil Rubs Off Mid-Tattoo | Excessive wiping or moisture | Work clean and avoid overhandling |
Pro Tips From Artists
- Practice on fake skin first until you get the hang of it
- Use high-quality stencil paper cheap paper fades faster
- Always mirror your design before printing
- Use lighting to double-check alignment
- If the stencil looks off, reapply it’s worth it
Example Walkthrough: Rose on the Forearm
Let’s say you’re applying a traditional rose on a client’s forearm.
- Design: You mirror and print it on thermal stencil paper
- Skin Prep: Shave, clean, sanitize
- Apply Primer: Thin layer of Anchored gel
- Stencil Application: You place it using the wrist bone as a guide
- Hold & Peel: Press for 8 seconds, peel slowly
- Wait: Let dry for 15 minutes
- Ready: You’re set to tattoo
Smooth lines, correct placement no stress during inking.
FAQs: Tattoo Stencil Application
Q: How long does a stencil last on skin?
A: If prepped correctly, it can last several hours without fading.
Q: Can I use deodorant instead of stencil gel?
A: Technically yes, but it’s not recommended use dedicated stencil solutions for best results.
Q: Do I have to mirror the design?
A: Yes! If you don’t mirror it, the design will appear reversed on the skin.
Q: Can I touch up a stencil that didn’t transfer fully?
A: It’s better to wipe and reapply instead of trying to “fix” it freehand.
Conclusion
Mastering the art of tattoo stencils gives you a serious edge as a beginner. Not only does it make your work cleaner and more consistent, but it also builds trust with clients who expect accuracy and professionalism.
From prepping the skin to peeling off that perfect stencil, every step matters. Get familiar with your tools, take your time with alignment, and never settle for a blurry transfer. You’ve got this.